Creating a New Chain Alert
You can create a webhook to receive notifications on different types of on-chain activity.
-
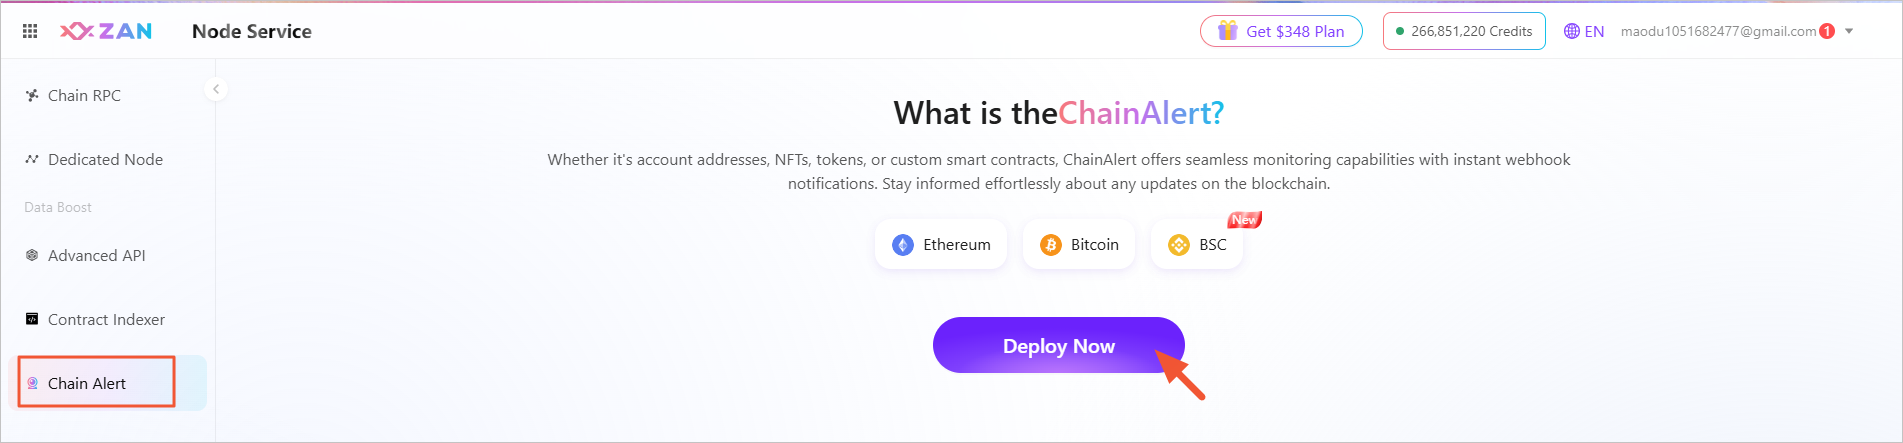
Log in to the ZAN Node Service Console, Click on Chain Alert on the left navigation bar.
-
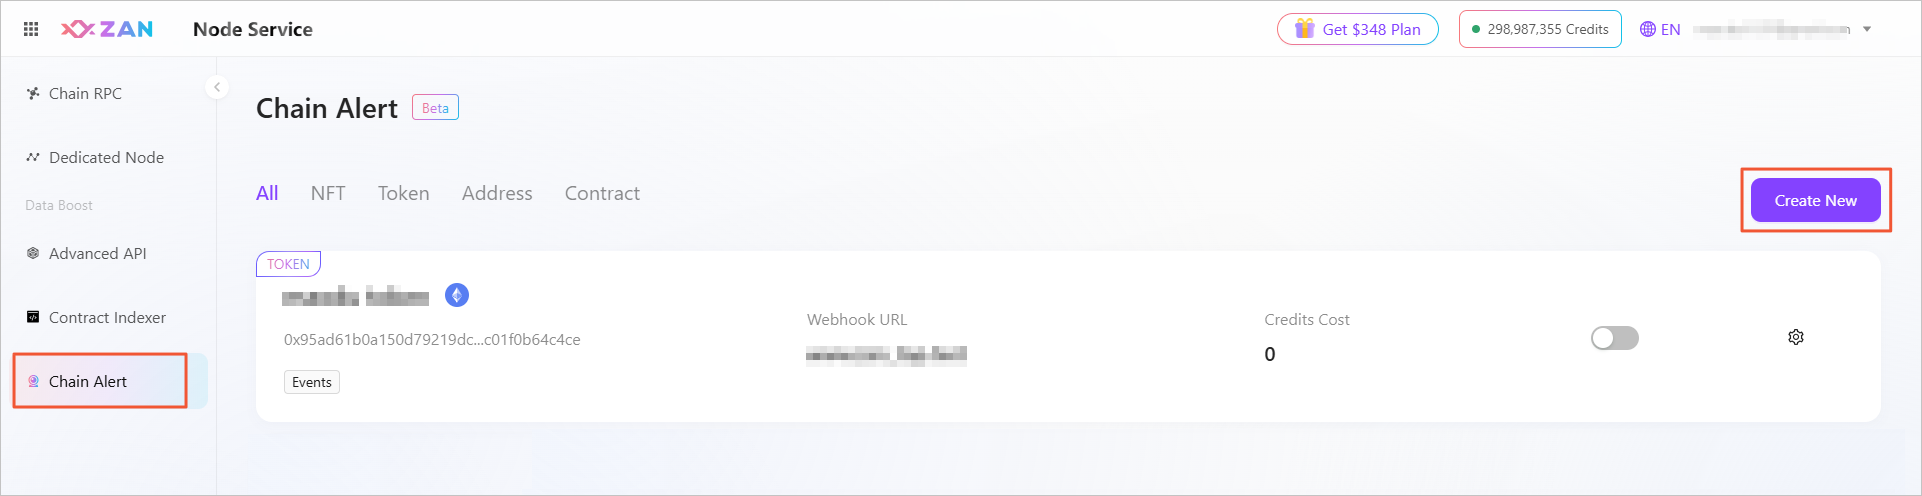
For the first creation, click Deploy Now for the first creation. For any subsequent creations, click Create New in the upper right corner of the page.
First creation:
Subsequent creations:
-
In the pop-up window, fill in the name of the webhook, and then select a contract template required for the webhook subscription.

-
According to the selected contract template, configure the corresponding parameters.
- NFT Collection Activity
| Configuration Items | Description |
|---|---|
| Chain | Required, currently only supports the Ethereum blockchain. |
| Network | Required, currently only supports the Ethereum blockchain. |
| Contract Address | Required, you need to enter the NFT contract address. If the address is correct but not an NFT contract, the system will automatically detect it and prompt you to click Replace template to switch to the Custom Contract Webhooks. |
| Webhook URL | Required, please configure the URL address of the server for integration with the application, mainly used to receive messages for subscription events. |
| Activity | After configuring a valid contract address, you need to configure the corresponding activity events. You can select the following different types of events for subscription, and you can select multiple or all.
|
- Specific NFT Activity
| Configuration Items | Description |
|---|---|
| Chain | Required, currently only supports the Ethereum blockchain. |
| Network | Required, currently only supports the Ethereum blockchain. |
| Contract Address | Required, you need to enter the NFT contract address. If the address is correct but not an NFT contract, the system will automatically detect it and prompt you to click Replace template to switch to the Custom Contract Webhooks. |
| Webhook URL | Required, please configure the URL address of the server for integration with the application, mainly used to receive messages for subscription events. |
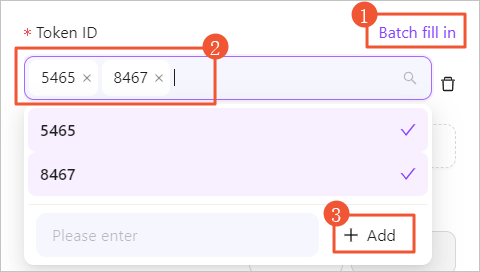
| Token ID | Required, supports both single and batch addition methods, and added items can be deleted during the process.
|
| Activity | After configuring a valid contract address, you need to configure the corresponding activity events. You can select the following different types of events for subscription, and you can select multiple or all.
|
- Token Activity
| Configuration Items | Description |
|---|---|
| Chain | Required, currently only supports the Ethereum blockchain. |
| Network | Required, currently only supports the Ethereum blockchain. |
| Contract Address | Required, you need to enter the Token contract address. If the address is correct but not an Token contract, the system will automatically detect it and prompt you to click Replace template to switch to the Custom Contract Webhooks. |
| Webhook URL | Required, please configure the URL address of the server for integration with the application, mainly used to receive messages for subscription events. |
| Activity | After configuring a valid contract address, you need to configure the corresponding activity events. You can select the following different types of events for subscription, and you can select multiple or all.
|
- Address Activity
| Configuration Items | Description |
|---|---|
| Chain | Required, currently only supports the Ethereum blockchain. |
| Network | Required, currently only supports the Ethereum blockchain. |
| Webhook URL | Required, please configure the URL address of the server for integration with the application, mainly used to receive messages for subscription events. |
| Address | Required, supports both single and batch addition methods, and added items can be deleted during the process.
|
| Activity | After configuring a valid contract address, you need to configure the corresponding activity events. You can select the following different types of events for subscription, and you can select multiple or all.
|
- Custom Contract Webhooks
| Configuration Items | Description |
|---|---|
| Chain | Required, currently only supports the Ethereum blockchain. |
| Network | Required, currently only supports the Ethereum blockchain. |
| Contract Address | Required, after entering the correct contract address, obtain the ABI file corresponding to the contract address by clicking Upload ABI or Get ABI.
 |
| Webhook URL | Required, please configure the URL address of the server for integration with the application, mainly used to receive messages for subscription events. |
| Activity | After successfully acquiring the contract ABI file, the platform supports subscribing to all methods with event type in the contract, allowing multiple or full selection. |
-
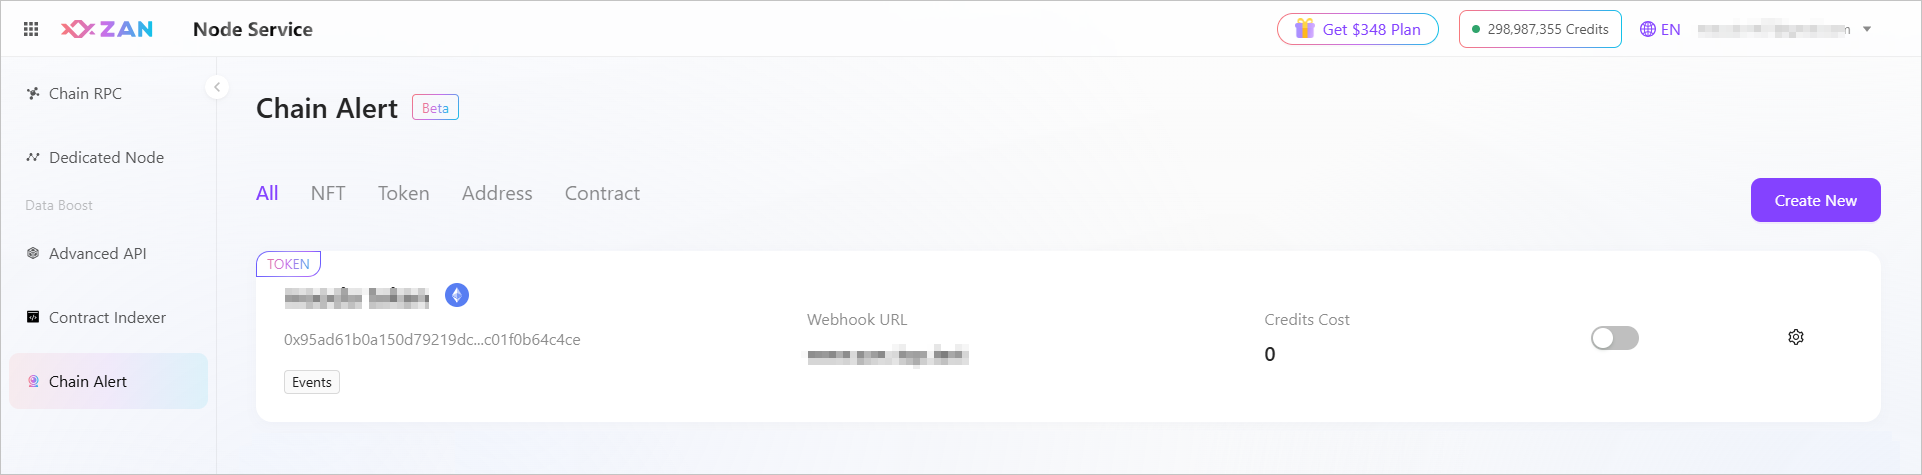
After completing the configuration, click Confirm, and your webhook appears in the list.
Note:
You can manage this subscription. For details, see Manage Chain Alerts.
Updated 7 months ago