Teamwork
Using the Teamwork module, primary accounts can grant module-level operational permissions for specific products to sub-accounts and view their operation audit logs.
Note:Only Dedicated Node users can configure member permissions using the Teamwork module in the ZAN console.
Module Permission Description
ZAN provides comprehensive permission options, which are categorized based on the following two product modules. Each module distinguishes between operational permissions and viewing permissions according to its specific features. When configuring roles, designate specific permission points to regulate member access privileges throughout system modules via role assignment.
| Product | Module | Feature | Permission Level | Permission Description |
|---|---|---|---|---|
| Dedicated Node | RPC Node | AK1 | ALL | |
| Only View | ||||
| AK2 | ALL | Same as AK1 (ALL) | ||
| Only View | Same as AK1 (Only View) | |||
| Solana RPC Node | Default | ALL | ||
| Default | Only View | View source IPs and endpoints | ||
| Teamwork | Operation details | Default | ALL |
For the Teamwork module under ZAN, permissions for the administrator account and member account are differentiated as follows:
| Module | Administrator Account Permissions | Member Account Permissions |
|---|---|---|
| Teamwork | • Create roles • Add members • Delete members • View member information • View operation details | • View member information • View operation records (role-bound) |
Member Management
Adding Members
You can add members at the ZAN account level and assign corresponding role permissions, granting them usage rights for relevant products within target modules.
-
Log in to the ZAN Node Service Console.
-
Hover over the account section at the top right corner.
-
Select Teamwork from the dropdown menu.
-
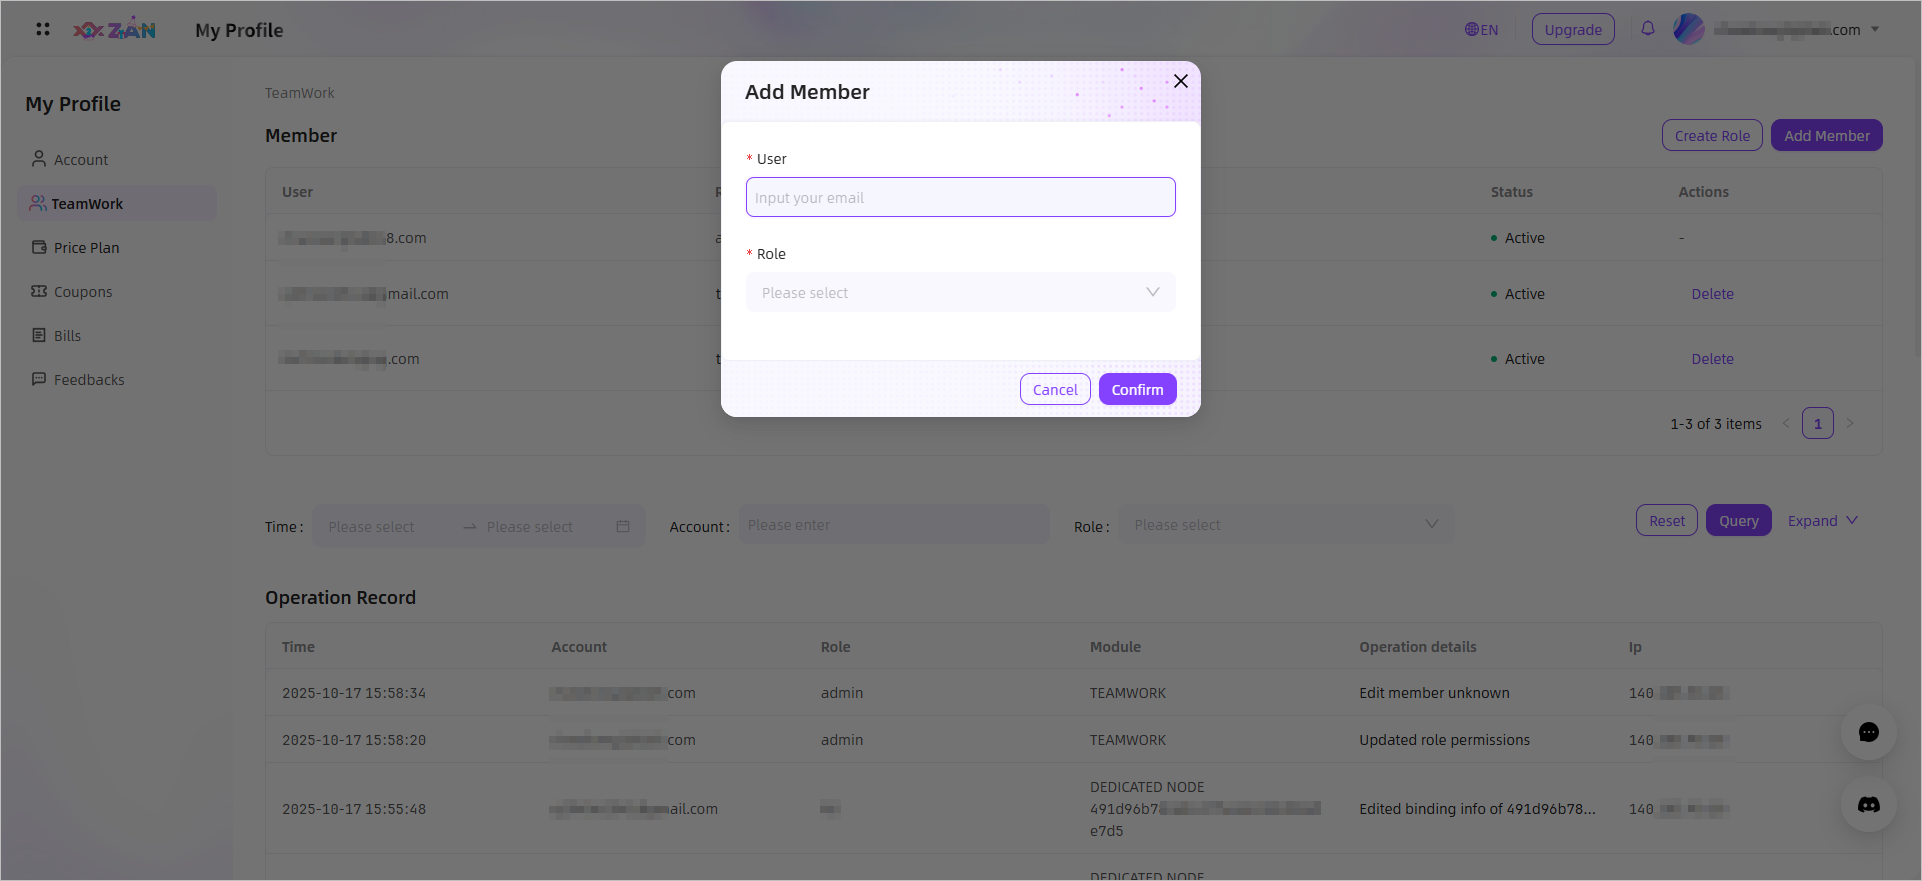
On the Teamwork page, click Add Member.
-
In the dialog box, enter the member’s email and select a role.
-
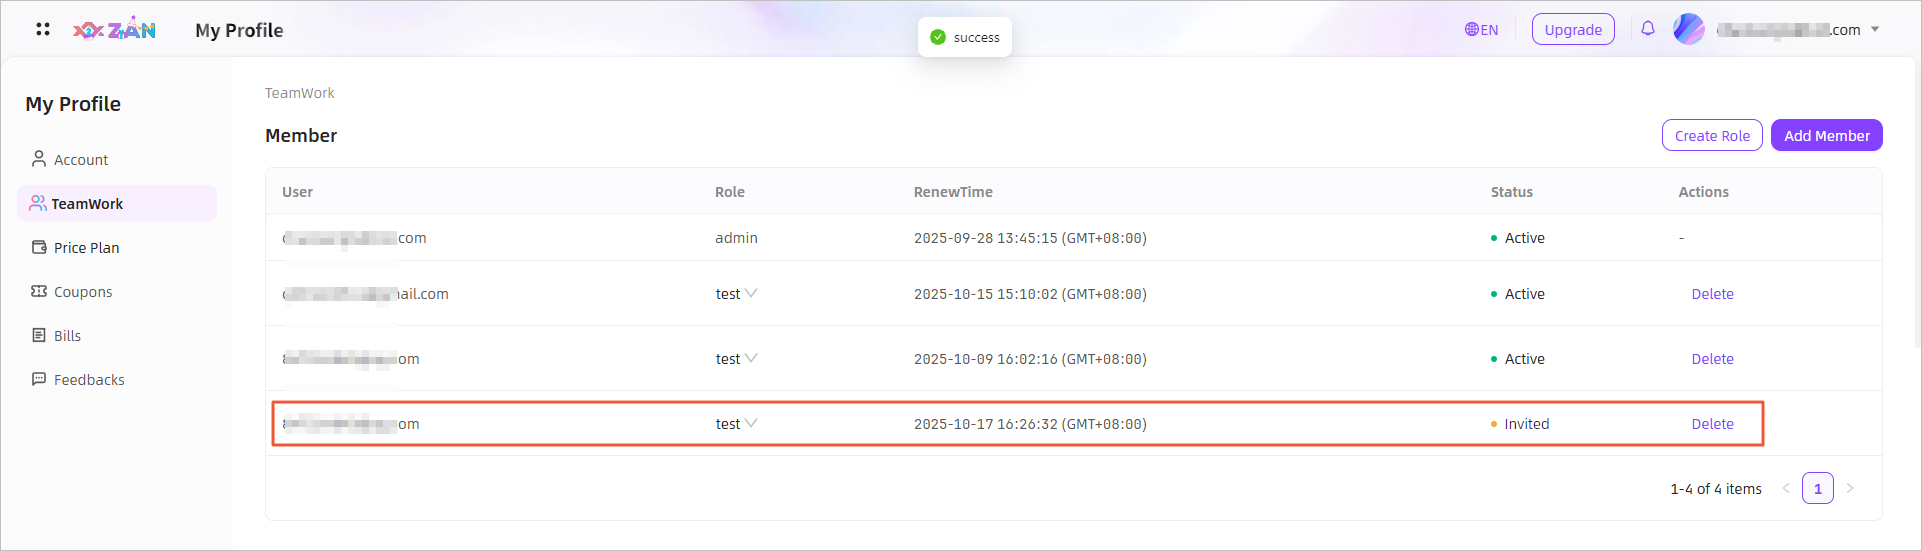
Click OK. ZAN sends an invitation email and the member appears in the list with status Invited.
-
After confirmation, the member becomes a project member of the API key.
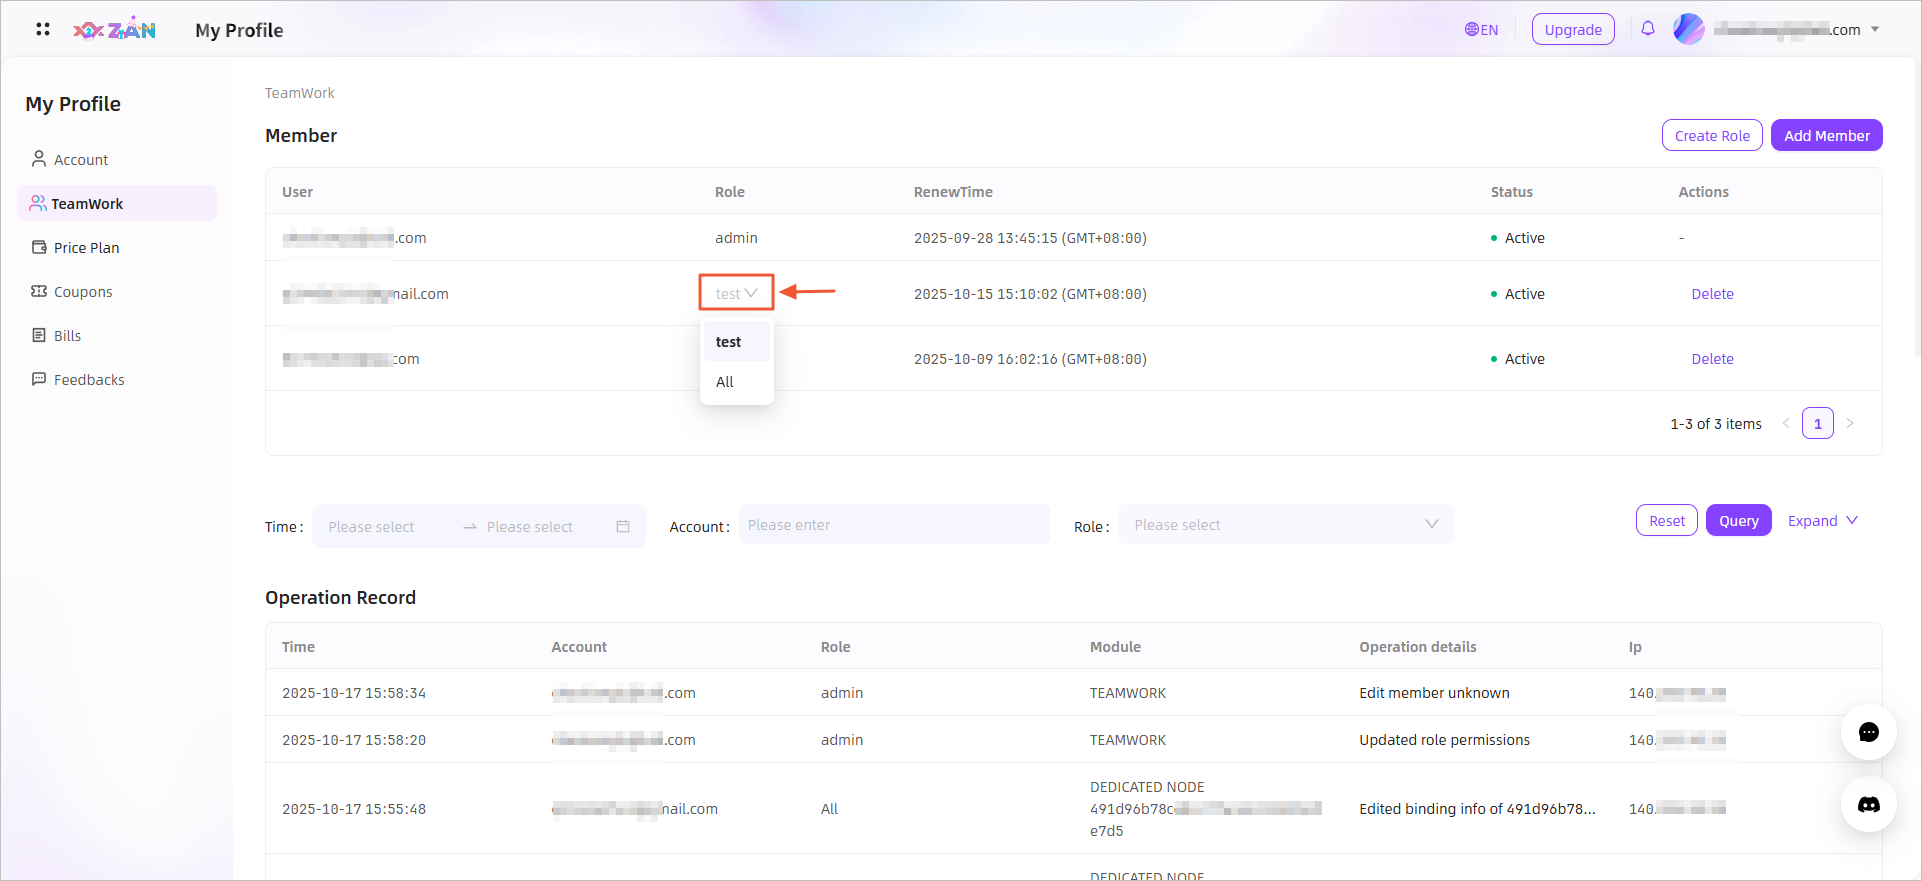
Modifying the Role of a Member
In the Member list, switch the Role column for the target member to change their role.
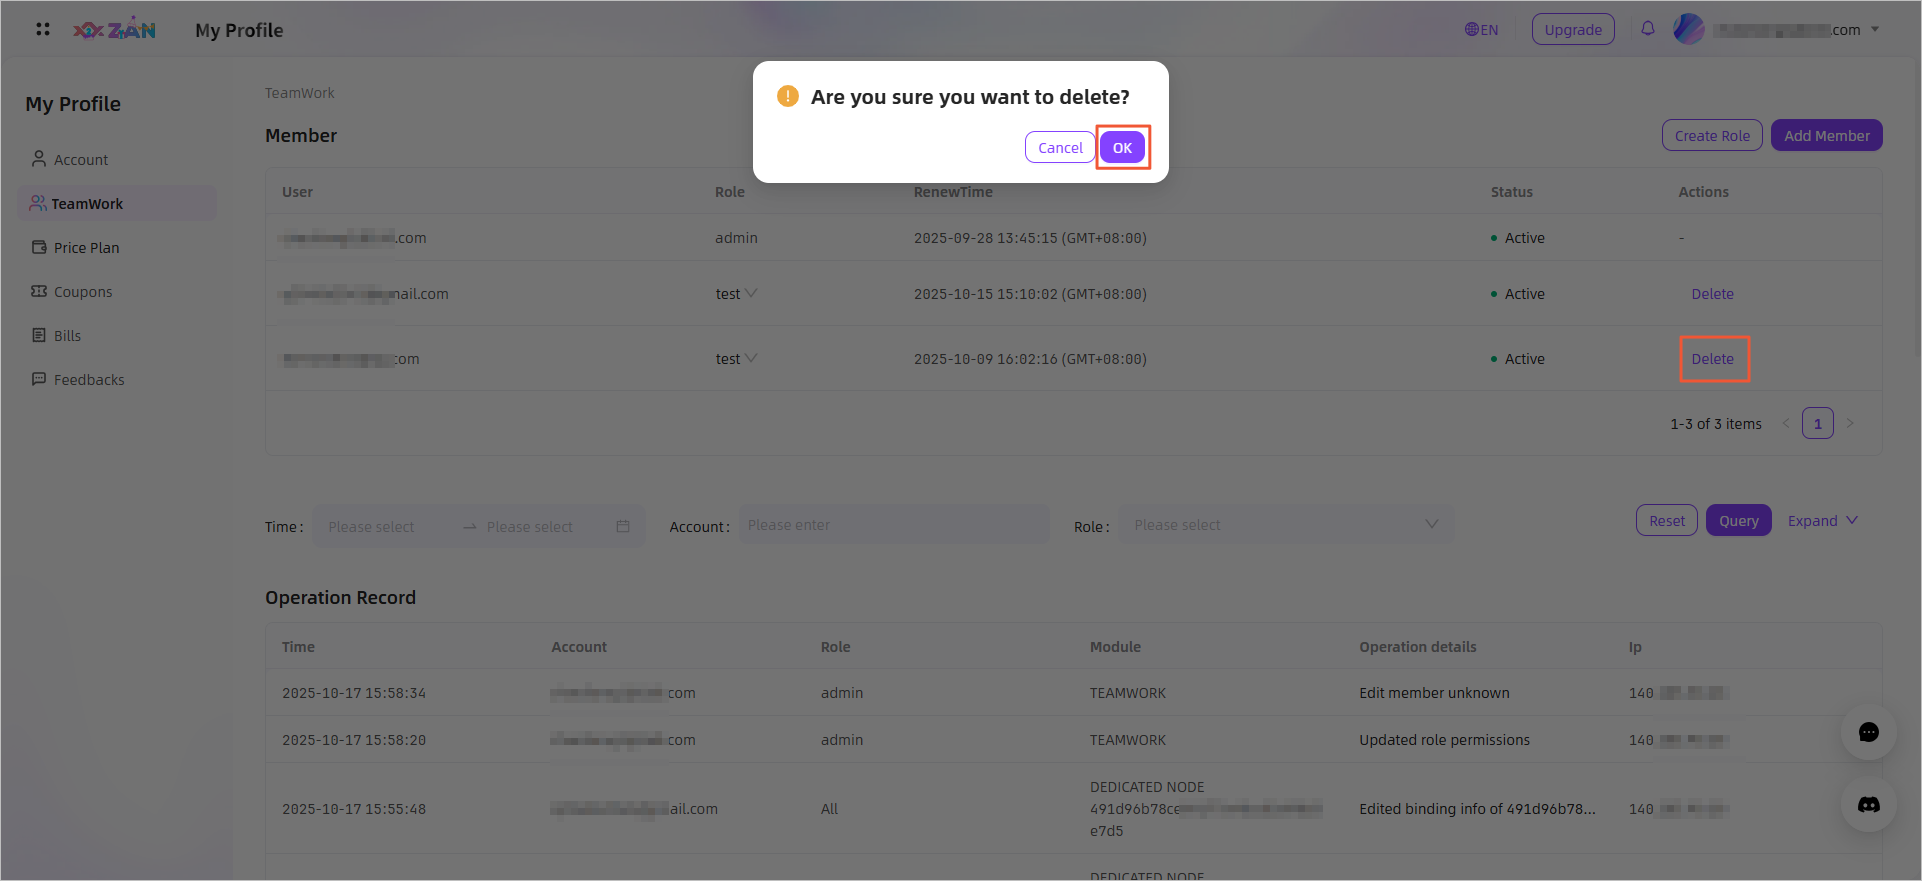
Deleting a Member
In the Member list, click Delete in the Action column for the target member and confirm.
Role Management
Create Custom Roles
-
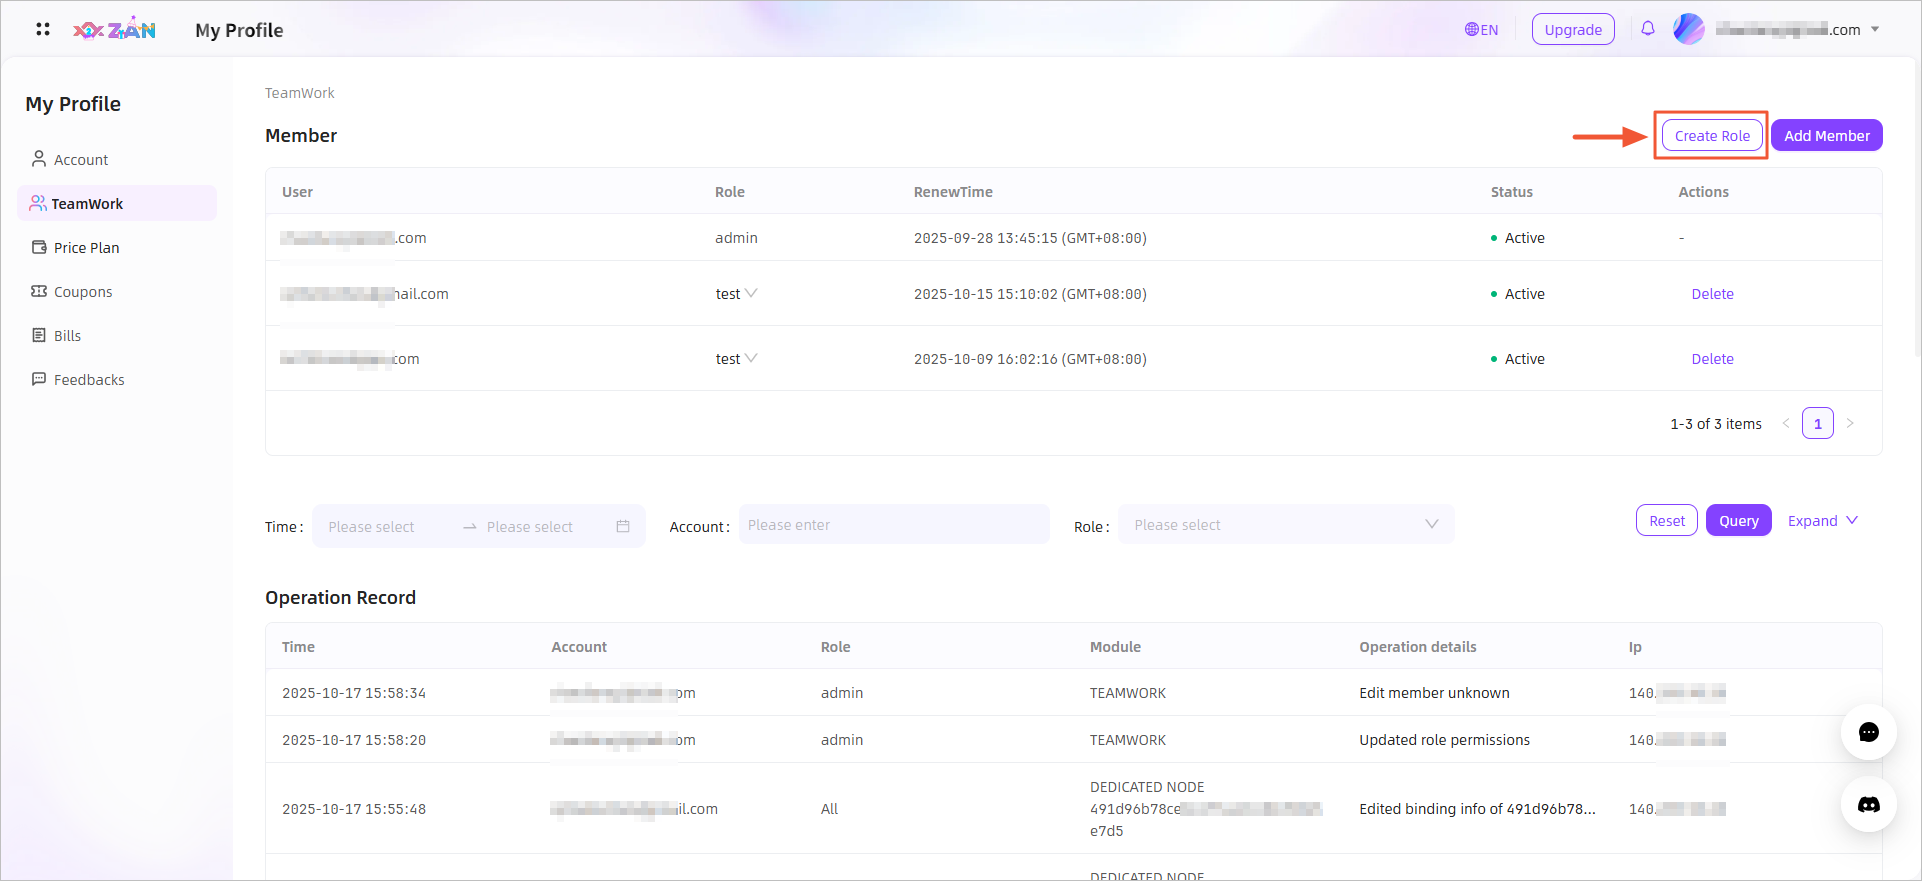
On the Member list, click Create Role.
-
In the right panel, click Add.
-
Enter a role name and select permissions.
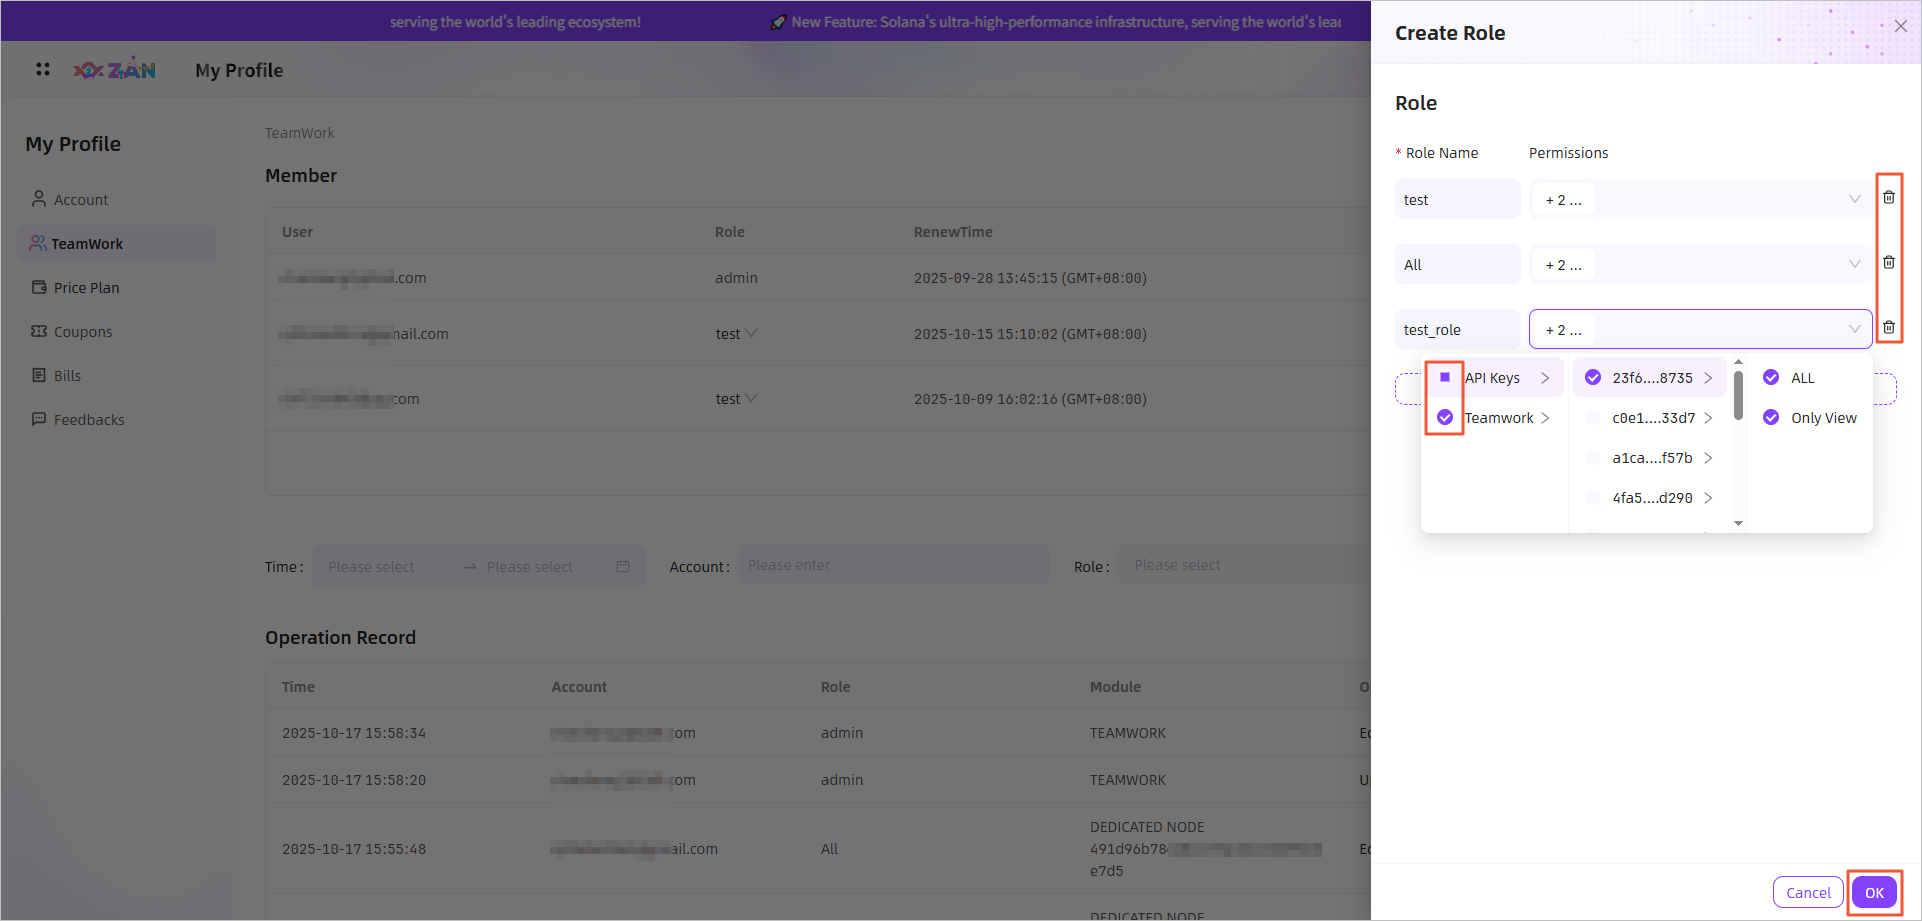 Note:
Note:Here you can also modify or delete existing roles.
-
Click Add to create more roles if needed.
-
Click OK to save.
Deleting a Role
Open Create Role → view all roles → click the Delete icon next to the target role → click OK.
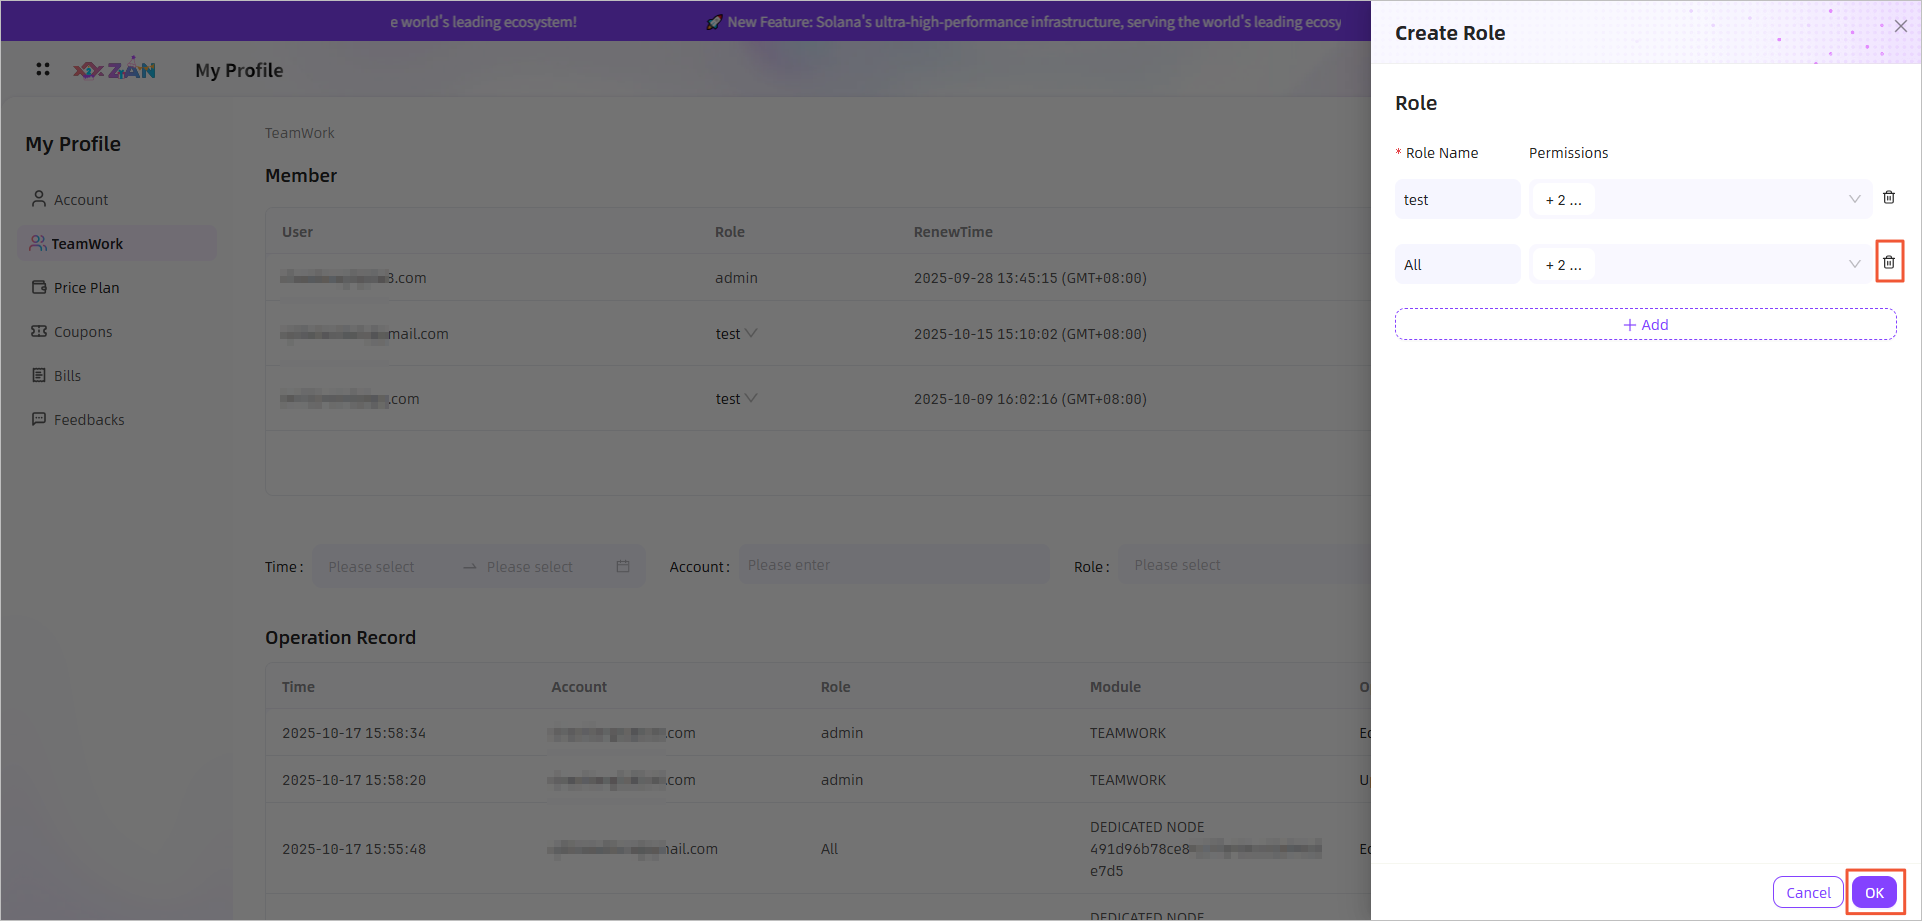
Note:Only unassigned roles can be deleted.
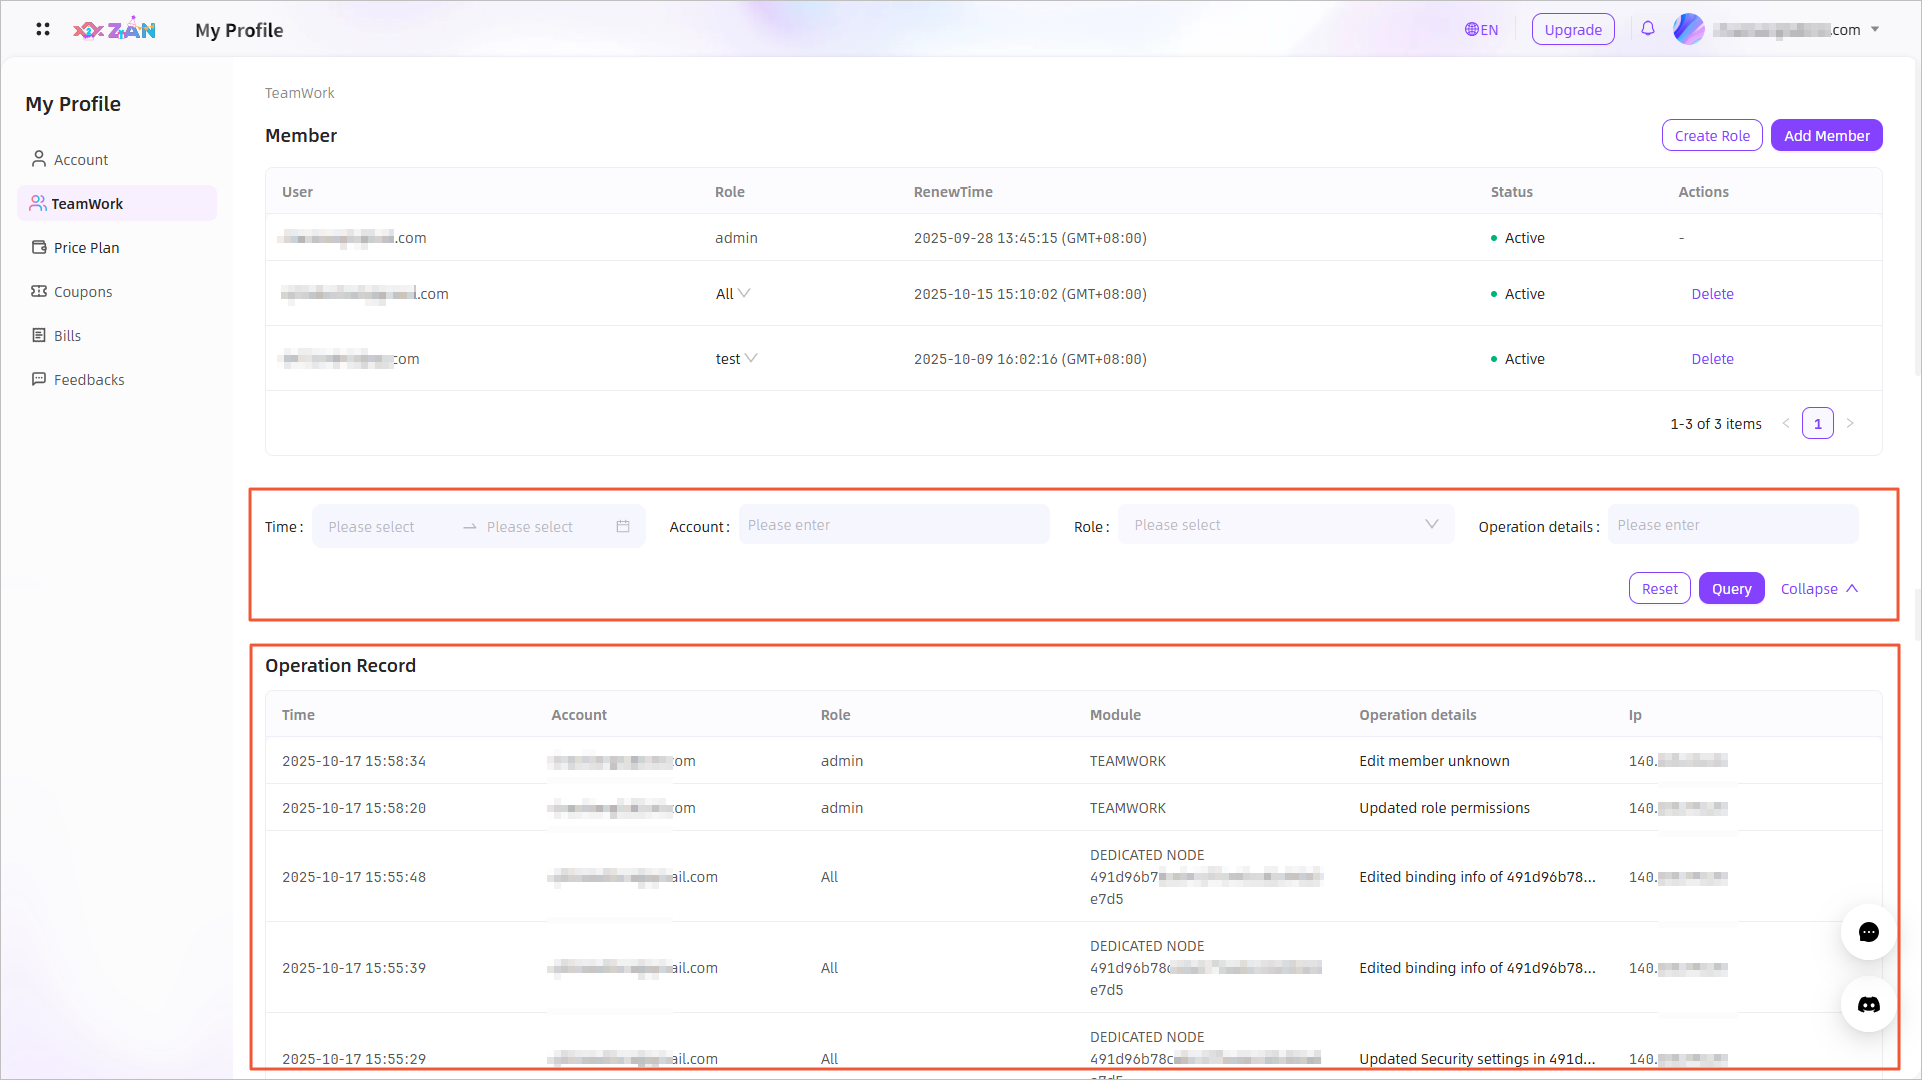
View Operation Details
Note:Only the administrator account and authorized member accounts can view all members' operation details.
On the Teamwork page, the Operation Records section displays all member actions. You can filter by Time, Account (fuzzy search), Role (multi-select), and Operation details (fuzzy search).
Updated 3 months ago