How to Install SmartCogent
Web SmartCogent
Through the web-based SmartCogent, there's no need to install a local development environment. Simply open a webpage on your computer, phone, or tablet, and you can immediately experience the intelligent programming capabilities of SmartCogent. Currently, the web version is available by invitation only. To receive the link and invitation code, please send an email to [email protected] with your name (informal names are acceptable), role (either Product or Development), and project details (optional). Should you have any questions or requirements, feel free to contact us.
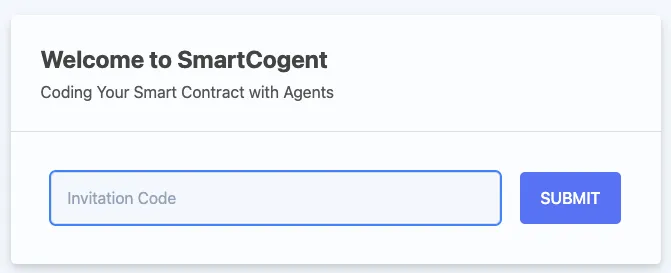
- Open the link and enter your invitation code.
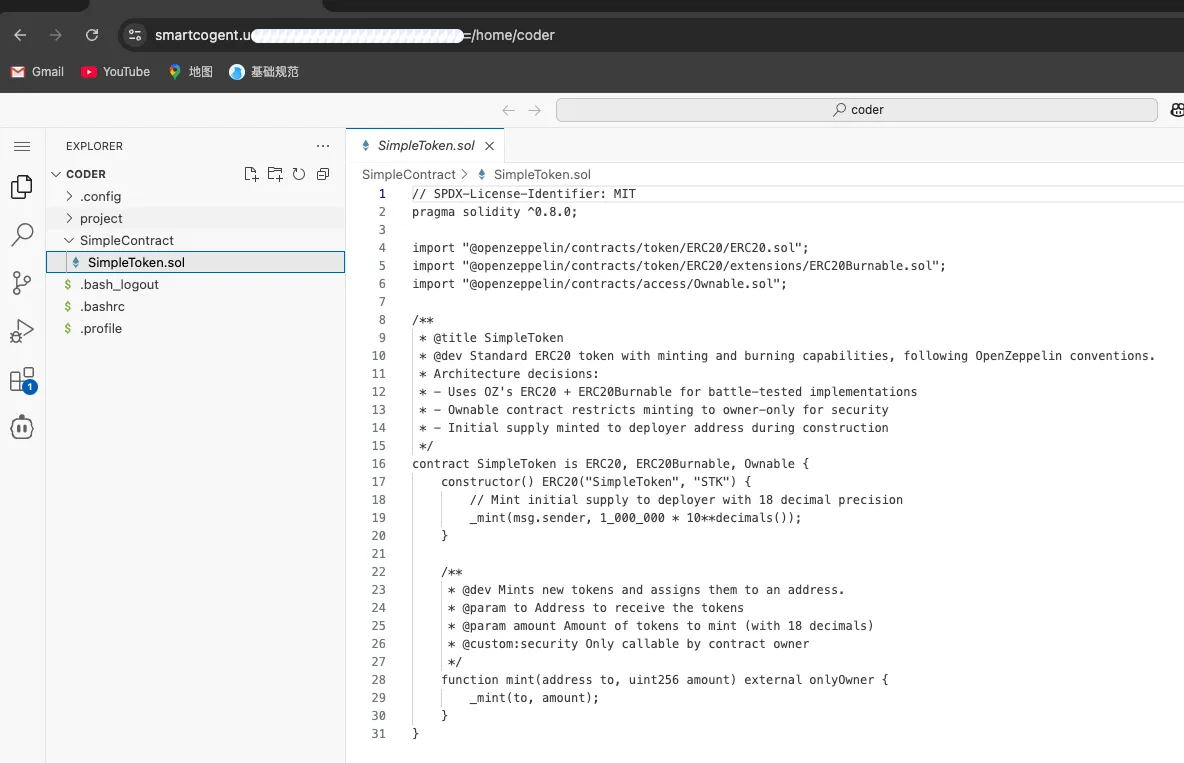
- Enter the IDEA interface.
We have prepared a test contract namedSimpleToken.solfor auditing and compilation.
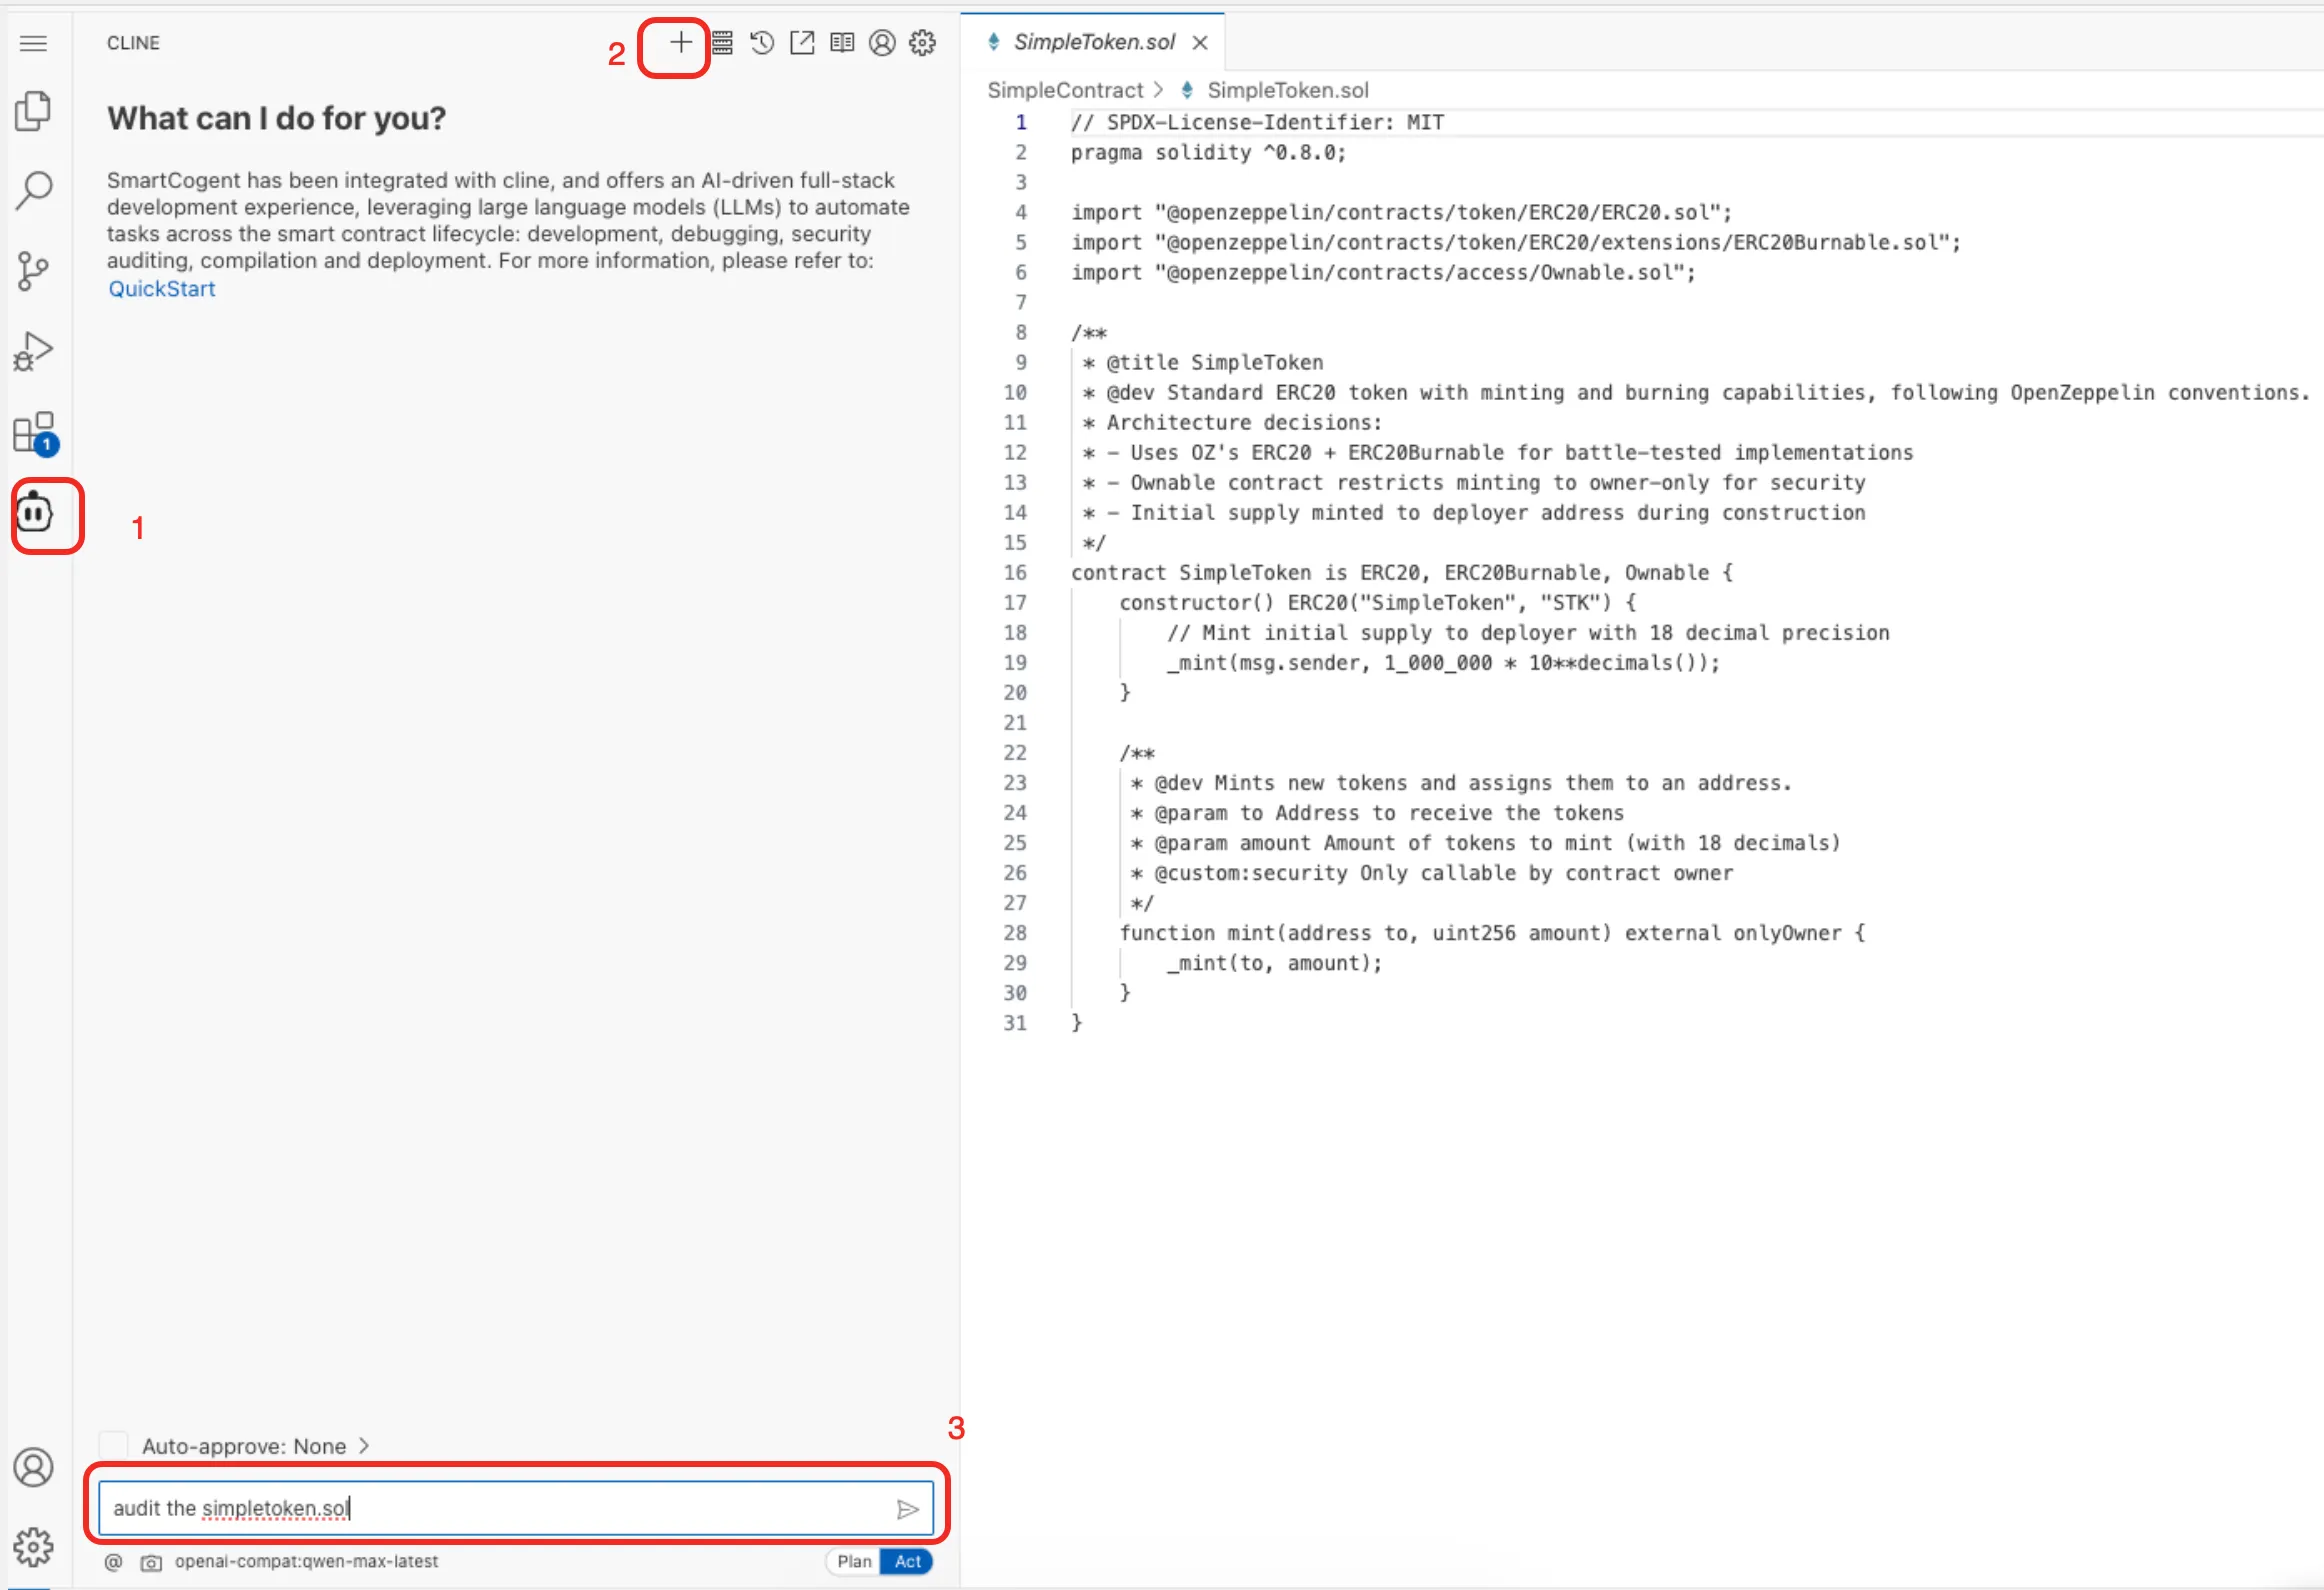
- Open SmartCogent and start chatting.
SmartCogent is pre-configured, and you can use it directly.
Local SmartCogent
Step 1: Register a ZAN Account
-
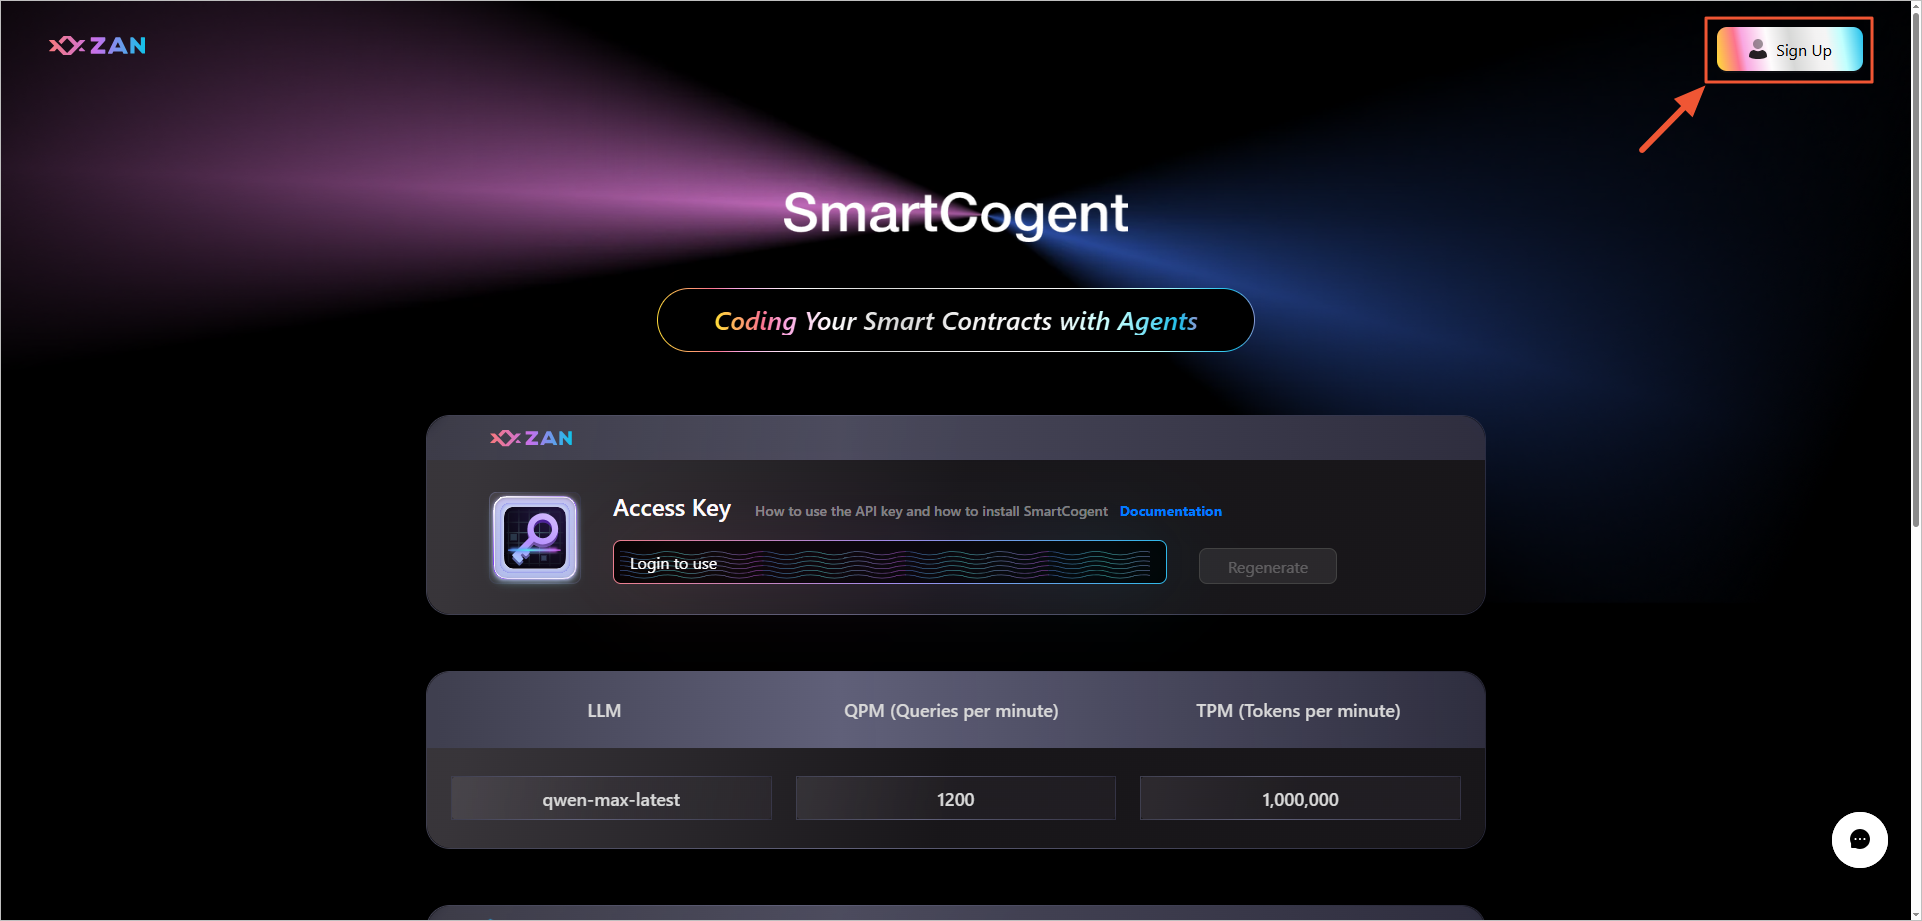
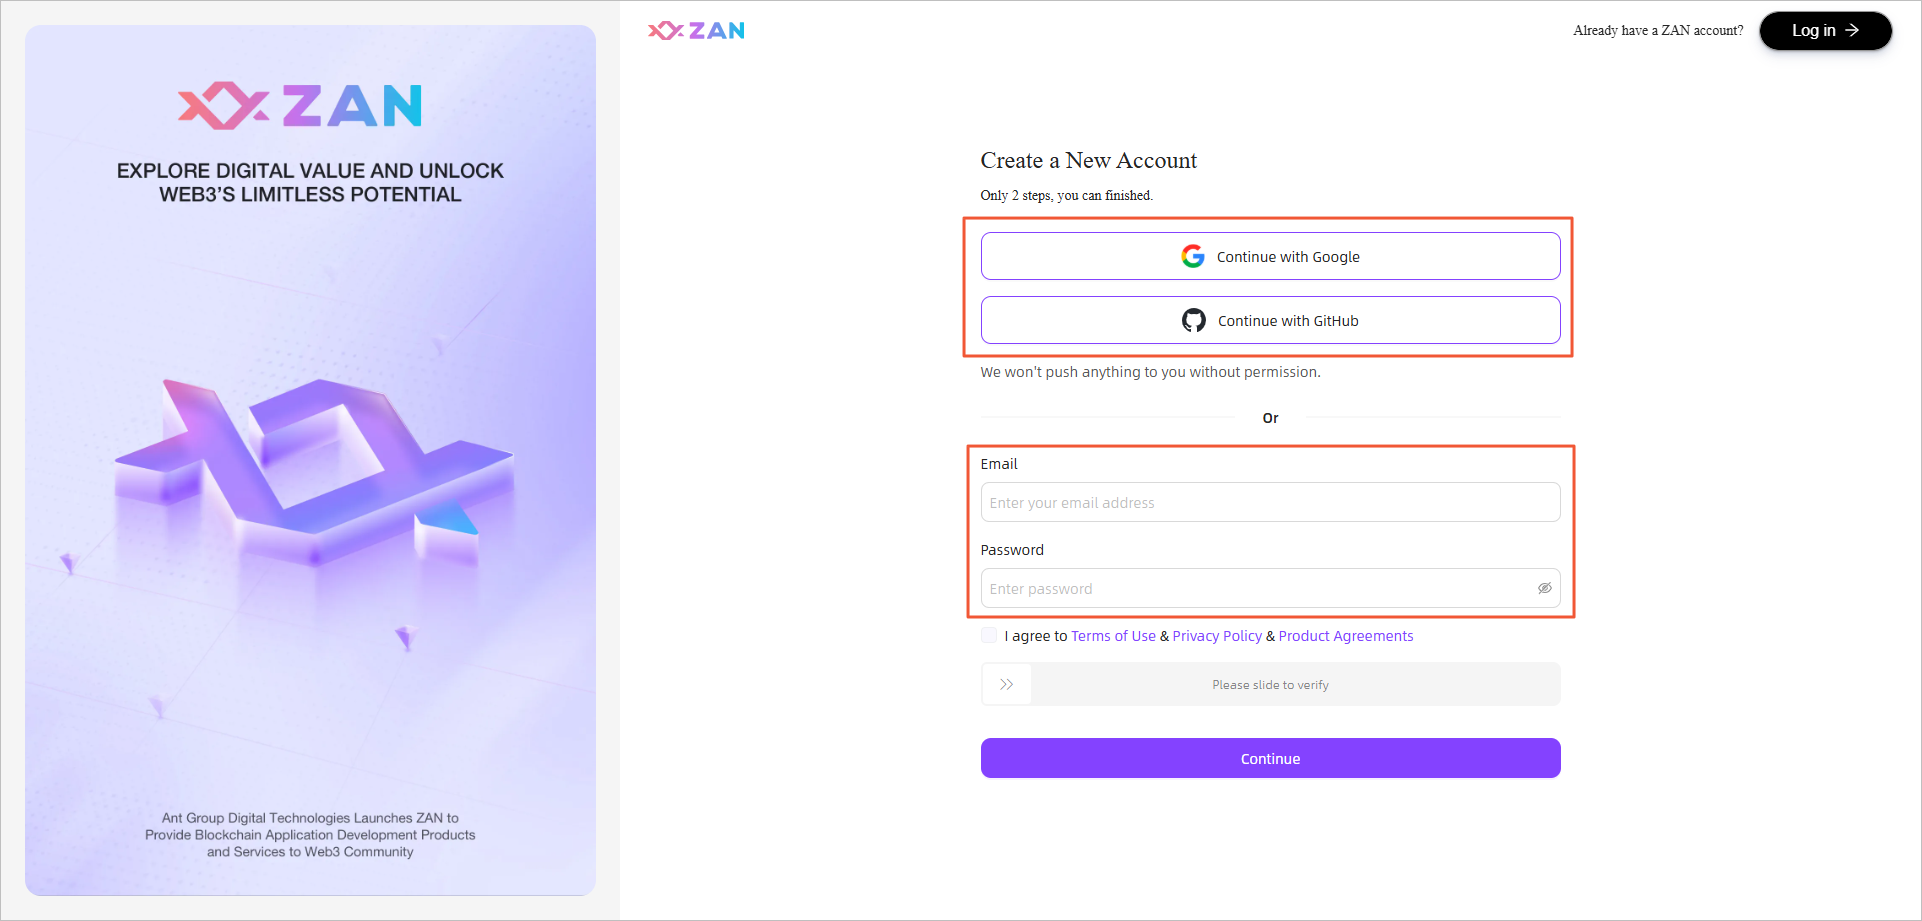
Visit the SmartCogent Official Website and click on Sign Up to go to the account registration page.
-
Register using your email or authorize login using Google or GitHub accounts.
-
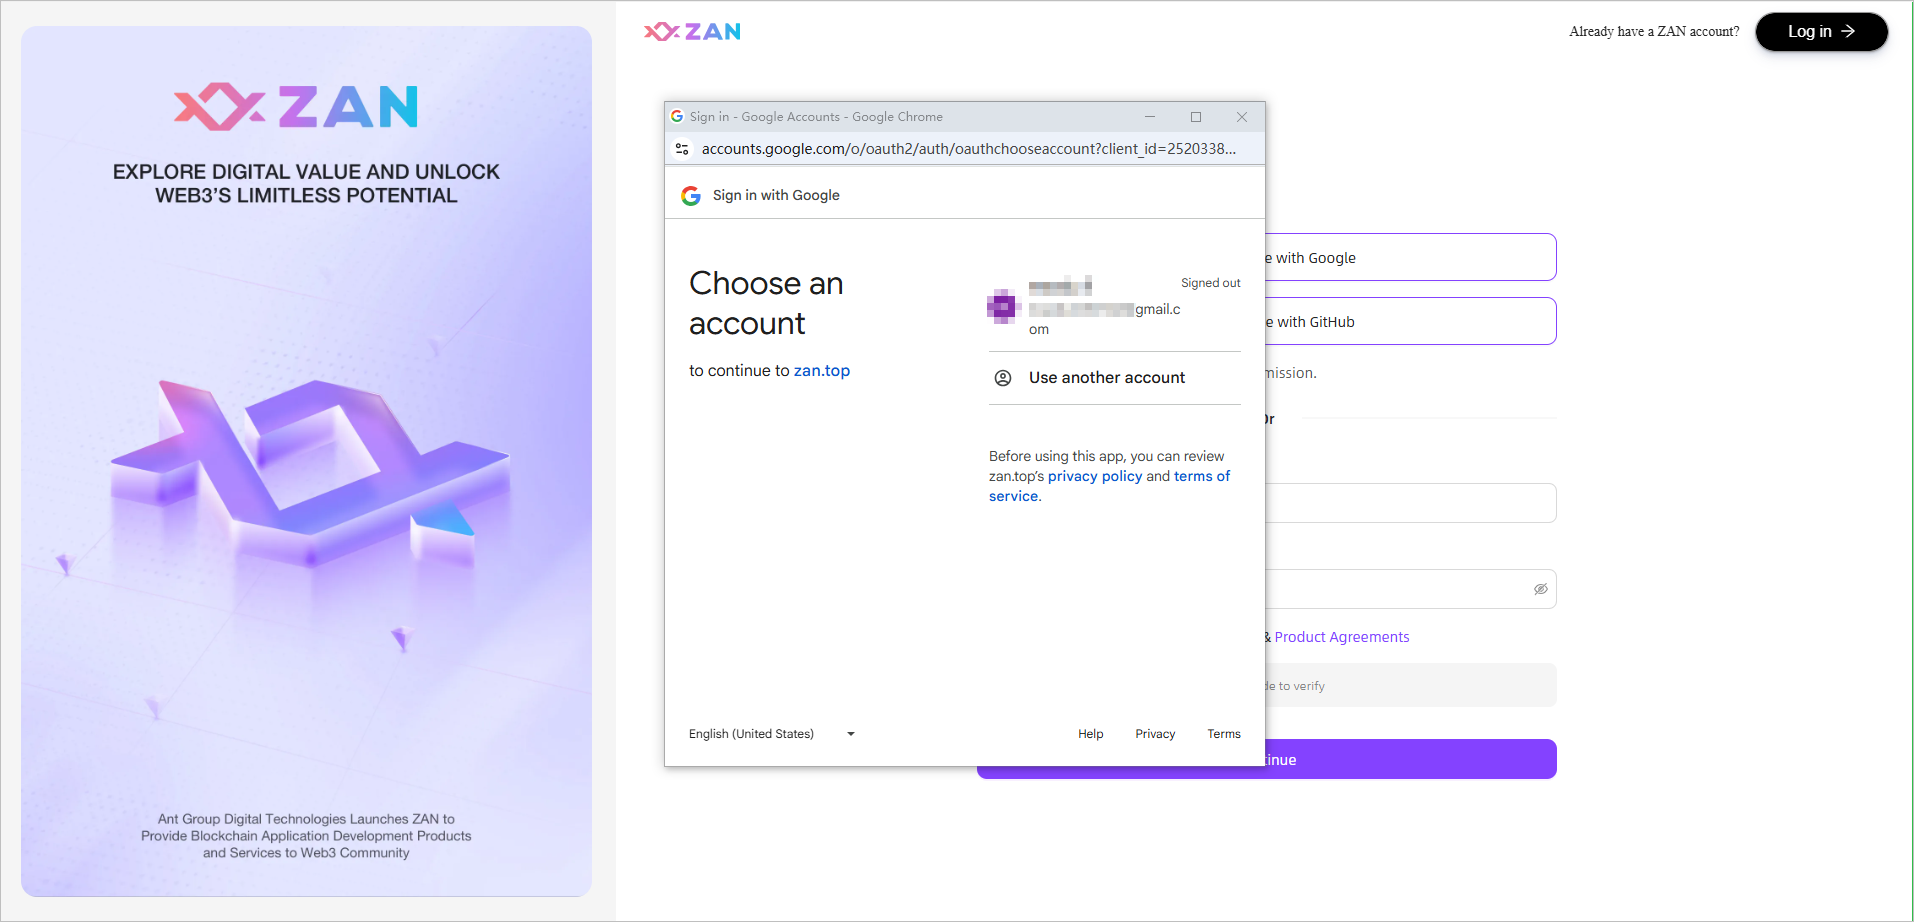
Taking Google account login as an example, click on "I agree to Terms of Use & Privacy Policy & Product Agreements", slide the verification slider to the far right, and click Continue to initiate the login process.
-
Agree to the relevant Google terms and click Continue to log in using the Google account.
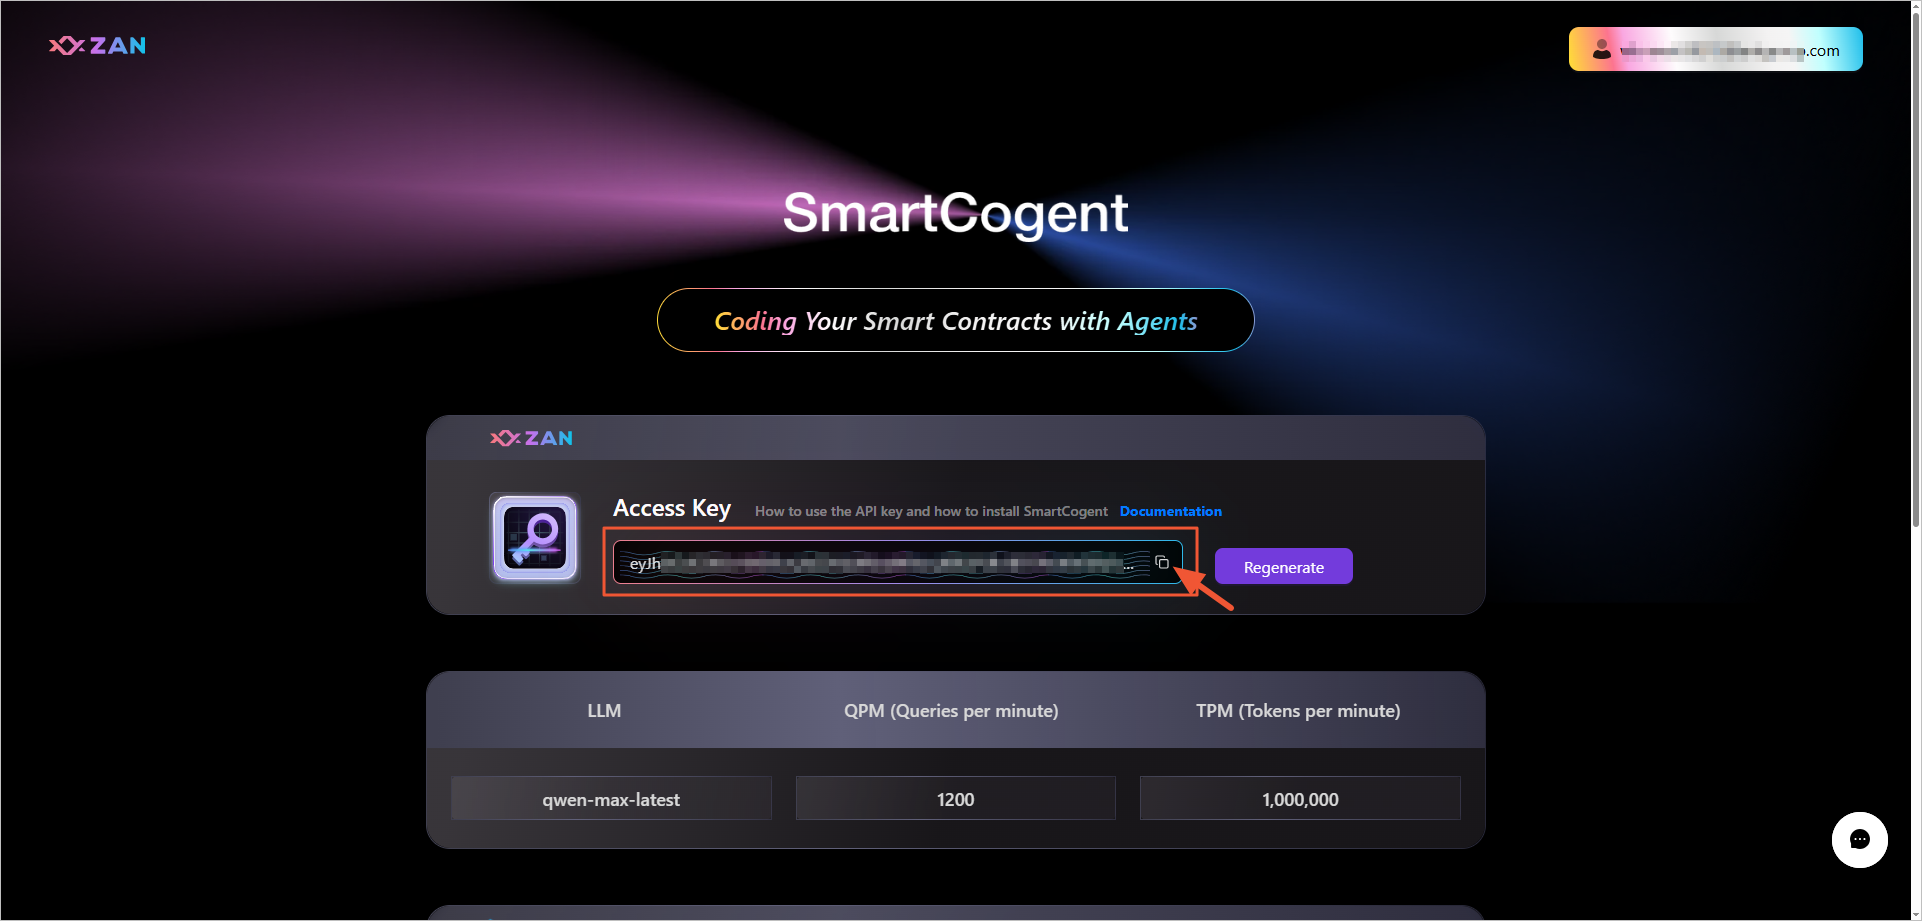
Step 2: Obtain AK and other information
Visit the SmartCogent page. Locate the copy icon in the depicted area and click on it to instantly obtain the Access Key.
Step 3: Install SmartCogent
-
Script Installation Method
Note:
Please ensure that your system has curl and bash tools installed in advance.
Execute the following command for one-click installation:
curl --retry 3 -o- https://static.zan.top/smartcogent/install.sh | bashUpon successful execution, the output information will be as follows:
$ curl -o- https://static.zan.top/smartcogent/install.sh | bash % Total % Received % Xferd Average Speed Time Time Time Current Dload Upload Total Spent Left Speed 100 2679 100 2679 0 0 120 0 0:00:22 0:00:22 --:--:-- 643 curl is installed at /opt/anaconda3/bin/curl NVM is not installed, installing NVM... % Total % Received % Xferd Average Speed Time Time Time Current Dload Upload Total Spent Left Speed 100 16631 100 16631 0 0 3578 0 0:00:04 0:00:04 --:--:-- 3578 ... Cline MCP settings file location: /Users/<username>/Library/Application Support/Code/User/globalStorage/saoudrizwan.claude-dev/settings/cline_mcp_settings.json Add our tool to your Cline MCP settings: { "mcpServers": { "contract-full-client": { "autoApprove": [], "disabled": false, "timeout": 3600, "command": "/Users/web3/node-v22.14.0-darwin-arm64/bin/npx", "args": [ "/Users/web3/node-v22.14.0-darwin-arm64/bin/smartcogent" ], "env": { "ZAN_ACCESS_KEY": "<your_zan_access_key>", "RPC_URL": "<your_chain_rpc_url>", "PUBLIC_KEY": "<your_chain_account>", "HOSTING": "metamask" }, "transportType": "stdio" } } } -
Browser Download Installation
Click on the download link to download theinstall.shfile, and execute this script file locally to complete the installation process of SmartCogent.
Step 4: Complete Configuration
Note:
- The Cline plugin is the core entry point of this product, providing seamless interaction with MCP services. Please complete the installation as described blow.
- If you have not installed vscode, please install it first.
- Click here to download Cline.
- (Optional) Download SARIF Viewer to facilitate the review of contract audit reports.
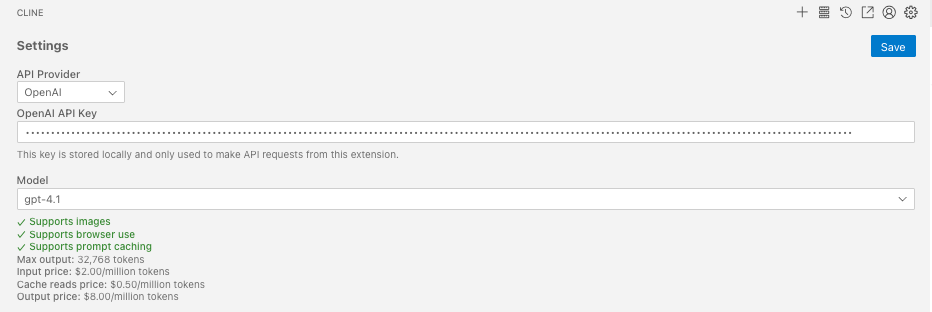
- After installing Cline, configure the large model first. Click the Cline icon on the left side of vscode, then enter the configuration interface via the gear icon in the upper right corner of the window. Fill in the following information according to your needs:
- API Provider: LLM API Provider
- Base URL: URL provided by the LLM API Provider
- API Key: API Key generated by your service provider's developer portal
- Model ID: Model name, e.g., Qwen-plus

- You can also directly choose the specific API provider and configure the API key. For instructions on obtaining the API key, please refer to OpenAI or DeepSeek.
- Open the Cline configuration file and add the results from Step 3 > Cline MCP settings.
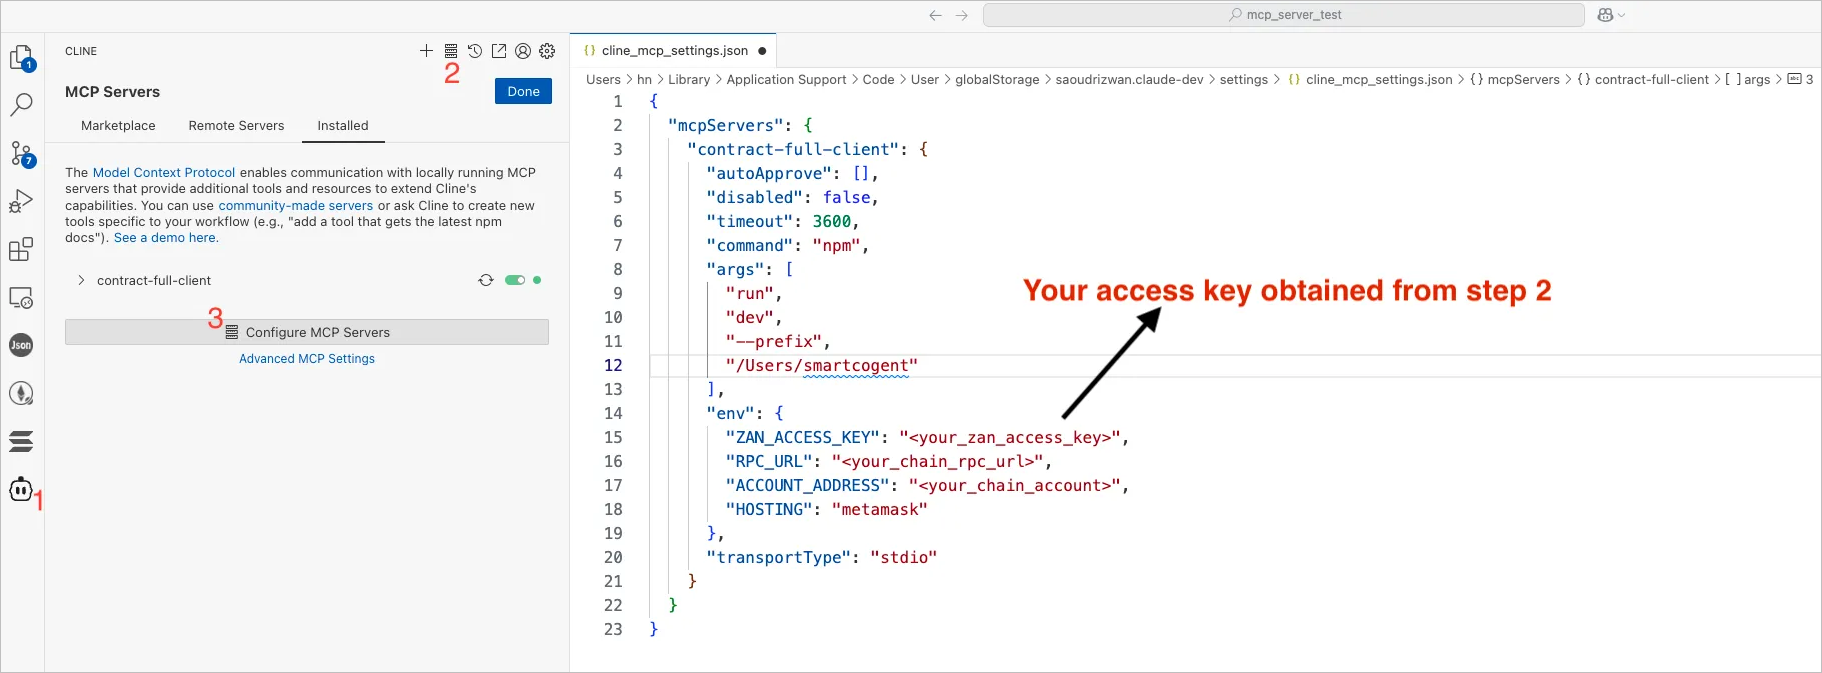
Note:
Currently, two contract deployment modes are supported: Sign By SmartCogent and Sign By MetaMask. The cline configuration files for these two modes are slightly different.
- ZAN_ACCESS_KEY: Please refer to Obtain AK and other information.
- RPC_URL (optional): Blockchain RPC URL, used only during contract deployment.
- ACCOUNT_ADDRESS(optional): obtained from MetaMask, used only during contract deployment, refer to Get the ACCOUNT_ADDRESS Required by SmartCogent.
- HOSTING(optional): The default value is "metamask"
Sign By SmartCogent
{
  "mcpServers": {
    "contract-full-client": {
      "autoApprove": [],
      "disabled": false,
      "timeout": 3600,
      "command": "/Users/web3/node-v22.14.0-darwin-arm64/bin/npx",
      "args": [
        "/Users/web3/node-v22.14.0-darwin-arm64/bin/smartcogent"
      ],
      "env": {
        "ZAN_ACCESS_KEY": "<your_zan_access_key>",
        "RPC_URL": "<your_chain_rpc_url>",
        "PRIVATE_KEY": "<your_chain_account_private_key>"
      },
      "transportType": "stdio"
    }
  }
}
Sign By MetaMask
{
  "mcpServers": {
    "contract-full-client": {
      "autoApprove": [],
      "disabled": false,
      "timeout": 3600,
      "command": "/Users/web3/node-v22.14.0-darwin-arm64/bin/npx",
      "args": [
        "/Users/web3/node-v22.14.0-darwin-arm64/bin/smartcogent"
      ],
      "env": {
        "ZAN_ACCESS_KEY": "<your_zan_access_key>",
        "RPC_URL": "<your_chain_rpc_url>",
        "PUBLIC_KEY": "<your_chain_account>",
        "HOSTING": "metamask"
      },
      "transportType": "stdio"
    }
  }
}
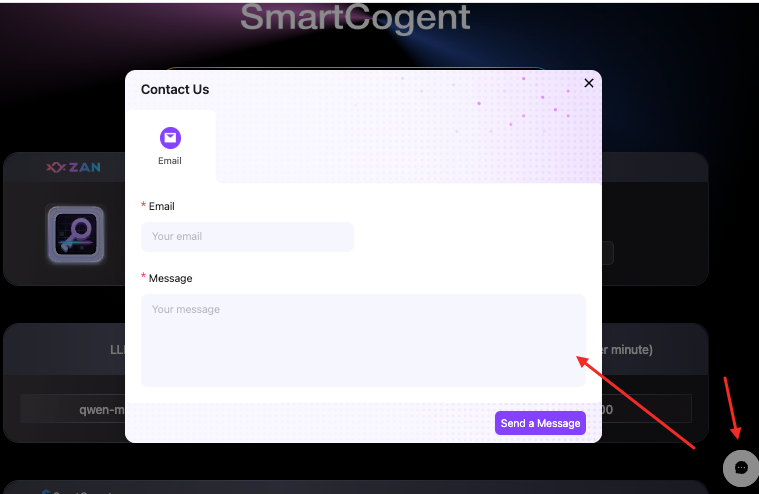
Contact Us
If you encounter any issues during the experience, please contact us in a timely manner. You can click the contact entry at the bottom right corner of the SmartCogent Official Website to ask your questions. You can also open an issue in our github repository: https://github.com/DTVMStack/DTVM.
Updated 6 months ago